
Sterilizer problems can slow down the entire clinic workflow.
When an autoclave slows down, leaks, throws repeated faults, or fails a spore test, the problem is bigger than a single machine. During busy hygiene schedules, one sterilizer issue can affect cassette turnover, procedure timing, instrument availability, and compliance documentation for the entire clinic. That is why autoclave repair in Vancouver needs to be handled quickly and correctly, especially in practices that run multiple sterilization cycles every day.
At BioDen, what we usually see in Vancouver clinics is not a dramatic “sudden” failure. Most of the time, the warning signs start earlier: slightly longer cycle, wet pouches, weak drying, a door that needs extra pressure to latch, or a sterilizer that reaches temperature more slowly than it used to. The machine is still running , so the problem gets ignored until it becomes downtime.
Sterilization or drying takes longer than normal.
Instruments come out wet or drying performance becomes weak.
The door needs extra pressure to latch or seal properly.
The sterilizer reaches temperature more slowly than before.
Autoclave repair should be connected to maintenance and monitoring.
Proper maintenance is not just about extending machine life. In B.C. dental practice , sterilization is part of a monitored safety system. Provincial guidance says heat tolerant instruments are usually sterilized by steam under pressure using Health Canada-registered medical sterilization equipment, with operating parameters set according to the manufacturer. The same guidance also treats sterilization as a multi-step process that requires qualified staff, regular monitoring, and preventive maintenance. That is why autoclave repair in Vancouver should always be discussed together with maintenance, monitoring, and requalification after major faults.
What we usually see in Vancouver clinic is that poor maintenance shows up first as inconsistency. The chamber still gets hot, but not predictably. Wrapped loads come out damp. Staff start opening the door early because they are in a rush. Reservoirs are topped up, but filters, air jet, gaskets, and sensors are not getting the same attention. Over time, that turns routine autoclave repair in Vancouver into emergency service.
Autoclave symptoms, likely causes, and first checks.
The symptom pattern below is synthesized from Midmark flow diagrams and technical parts maps, Tuttnauer troubleshooting and maintenance documents, Enbio’s official code guidance, and SciCan chambered-autoclave error tables. It is designed for first-line clinical triage before a technician arrives.
| Common symptom in clinic use | Likely causes | First-line checks before service call |
|---|---|---|
| Unit fails to reach proper temperature or pressure | Low water, clogged fill or vent path, dirty air jet, heating element weakness, temperature or pressure sensing fault, chamber leak. | Confirm water level, inspect visible filters or air jet, look for steam leaks, stop repeated test cycles if the fault returns. |
| Cycle takes much longer than normal | Scale build-up, partial blockage, weak heating performance, poor air removal, overloaded chamber. | Reduce load, verify correct water, inspect for blocked drains or hose issues, compare to normal cycle history. |
| Water leaks or the unit fails to drain | Damaged gasket, restricted drain line, loose fitting, vent valve or condensate path issue. | Check door seal condition, drain bottle or reservoir level, hose routing, and visible kinks. |
| Pouches or cassettes stay wet | Drying interrupted, door opened too early, poor vacuum or venting, airflow or filter issue, oversized load. | Let the full drying phase finish, confirm correct loading, inspect seals and air or dry components. |
| Frequent error messages on the display | Sensor fault, lock fault, water quality issue, power issue, PCB interpretation fault. | Record the exact code, note the cycle phase where it occurred, and avoid guessing from the code alone. |
| The door does not close, lock, or release properly | Misalignment, worn seal, dirty latch area, lock microswitch or actuator issue, residual pressure. | Inspect the gasket, clean the latch zone, verify chamber pressure is equalized before forcing anything. |
Unit fails to reach proper temperature or pressure
Low water, clogged fill or vent path, dirty air jet, heating element weakness, temperature or pressure sensing fault, chamber leak.
Confirm water level, inspect visible filters or air jet, look for steam leaks, stop repeated test cycles if the fault returns.
Cycle takes much longer than normal
Scale build-up, partial blockage, weak heating performance, poor air removal, overloaded chamber.
Reduce load, verify correct water, inspect for blocked drains or hose issues, compare to normal cycle history.
Water leaks or the unit fails to drain
Damaged gasket, restricted drain line, loose fitting, vent valve or condensate path issue.
Check door seal condition, drain bottle or reservoir level, hose routing, and visible kinks.
Pouches or cassettes stay wet
Drying interrupted, door opened too early, poor vacuum or venting, airflow or filter issue, oversized load.
Let the full drying phase finish, confirm correct loading, inspect seals and air or dry components.
Frequent error messages on the display
Sensor fault, lock fault, water quality issue, power issue, PCB interpretation fault.
Record the exact code, note the cycle phase where it occurred, and avoid guessing from the code alone.
The door does not close, lock, or release properly
Misalignment, worn seal, dirty latch area, lock microswitch or actuator issue, residual pressure.
Inspect the gasket, clean the latch zone, verify chamber pressure is equalized before forcing anything.
Repeat symptoms matter.
In plain language, clinics searching for autoclave repair in Vancouver should call sooner rather than later if they see repeat symptoms in the same cycle stage. A fill-stage pattern usually points toward water delivery, level sensing, or a blocked path. A heat-stage pattern points toward heaters, thermostatic protection, or temperature sensing. A sterilize-stage fault often suggests leaks or unstable control. A vent or dry-stage issue usually means airflow, vacuum, drain, or door-seal problems.
Error codes should guide diagnosis, not replace it.
One important note before the codes below: autoclave repair in Vancouver should never rely on a code label alone. Error codes are not standardized across brands.
In official documentation, BRAVO G4 uses E007 for a fan problem and E022 for a door-lock microswitch fault, while Enbio uses a different numbering system entirely, including Code 15 for a door-locking mechanism fault and Code 18 for a pressure sensor failure. Treat the codes below as a practical field guide for some controller families, not as universal definitions for every sterilizer on the market.
Pressure, power, or control-entry fault
E001 usually gets approached as a pressure, power, or control-entry fault depending on the unit.
Start by confirming stable wall power and a dedicated outlet where required, then inspect water level, visible chamber filters, and any sign of a blocked fill or vent path.
If the fault appears during the same part of the cycle every time, record that pattern for the technician. Diagnosis must begin with the cycle stage, not just the number.
Fan, airflow, lock confirmation, or controller feedback
E007 is often treated in clinics as a lock or airflow warning, but official manuals show why caution matters: on BRAVO G4, E007 is a fan problem, not a door problem.
Check airflow around the unit, visible cooling or fan obstruction, and whether the fault appears before the sterilization hold or during drying.
If your model family uses E007 differently, the technician still starts by determining whether the failure is mechanical cooling, airflow, lock confirmation, or controller feedback.
Door-lock microswitch or lock-related fault
E022 is often described online as a heater fault, but official BRAVO documentation assigns E022 to door-lock microswitch failure.
Check whether the door is fully closing, whether the seal is clean and seated, and whether the machine is still holding residual pressure.
Do not force the door. Repeated lock-related faults are one of the clearest indicators that autoclave repair in Vancouver should move from in-house checks to technician service.
Vacuum, pump, drain, or exhaust-path fault
E035 is commonly used in the field as a vacuum or pump shorthand on some machines, even though numbering varies by brand.
Check for a worn or dirty door gasket, a kinked or submerged drain hose, a full waste bottle, excessive load weight, blocked exhaust paths, or inadequate space around the unit for cooling.
Enbio’s official troubleshooting for vacuum-related failures follows the same logic, which makes this a reliable first-line checklist even when the exact code label differs.
Water-level or sensor-family fault
E045 is typically handled in the field as a water-level or sensor-family fault on some controller sets, but again, the number itself is not universal.
Verify the feed-water source, confirm the intake path is not blocked, inspect for scale, clean accessible sensor surfaces where the manufacturer allows it, and confirm the machine is using the correct water quality.
Water-quality and sensor issues are among the most common reasons clinics end up needing autoclave repair in Vancouver, especially on compact high-speed units.
Preventive maintenance keeps sterilizers reliable and compliant.
This maintenance schedule combines official manufacturer guidance from Midmark, Tuttnauer, SciCan, Flight, and Enbio with B.C. dental office monitoring expectations.
B.C. compliance considerations
For B.C. compliance, the weekly and professional tasks matter just as much as the daily ones. Provincial guidance says mechanical indicators should be checked and recorded for each load as much as possible, biological indicators must be used at least weekly for each sterilizer, the daily operation of every sterilizer must be reviewed and documented, and any sterilizer with a failed BI should be removed from service while the problem is investigated. That is exactly why preventive plans are part of autoclave repair in Vancouver, not a separate topic.
Brands We Service Across Vancouver Clinics
Different autoclave platforms use different control systems, drying logic, vacuum generation methods, sensors, and maintenance procedures. Our team services a wide range of sterilizers commonly found in Vancouver dental clinics.

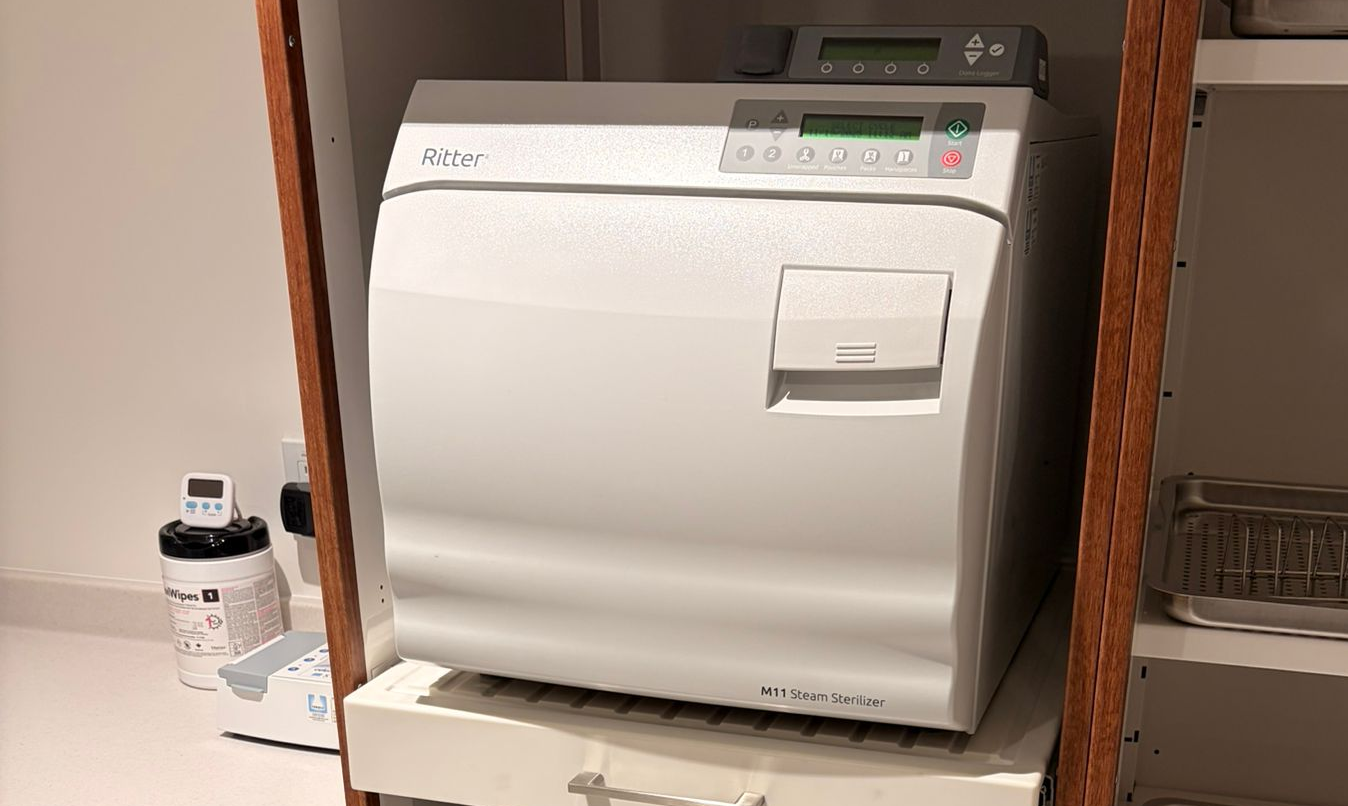
Midmark M9 & M11
Midmark publishes some of the clearest service documentation in the industry, making these units excellent examples of why troubleshooting should follow cycle stages rather than guesswork.
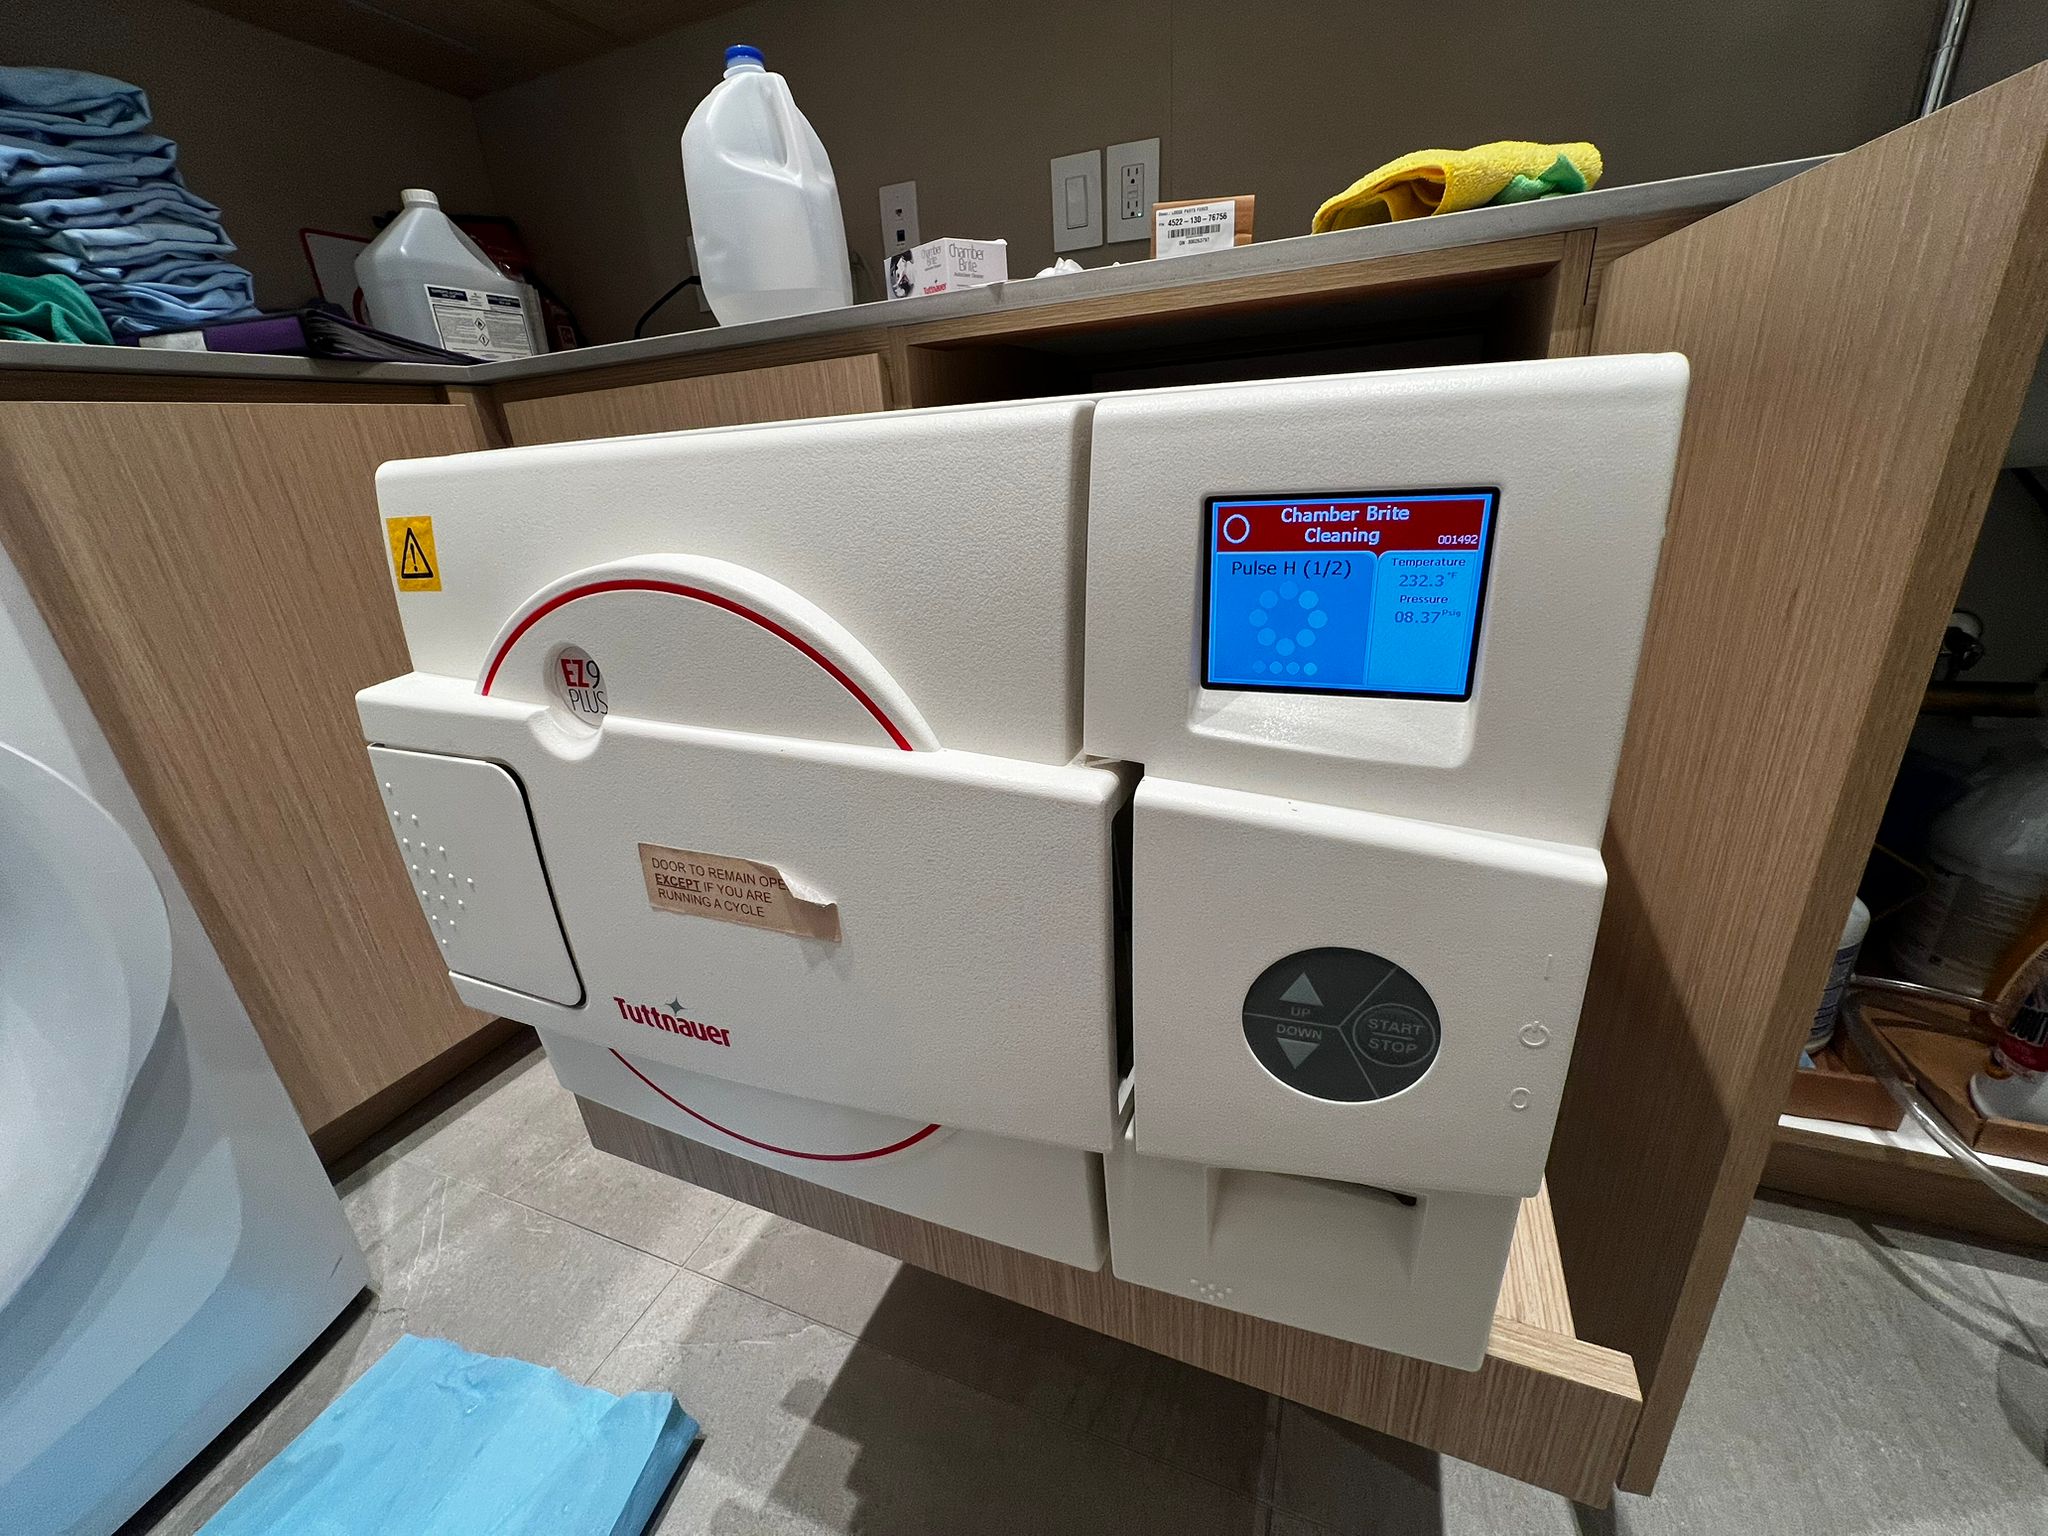
Tuttnauer EZ9, EZ11 & T-Top
These units commonly develop drying, air-removal, gasket, and sensor-related issues long before a complete shutdown occurs.
STATIM, BRAVO & STATCLAVE
Cassette-based sterilization creates a completely different service profile focused on seals, drying systems, airflow, vacuum integrity, and lock feedback.


Enbio S & Enbio Pro
High-speed Class B sterilizers that require careful attention to hoses, water quality, filters, vacuum systems, and chamber control logic.

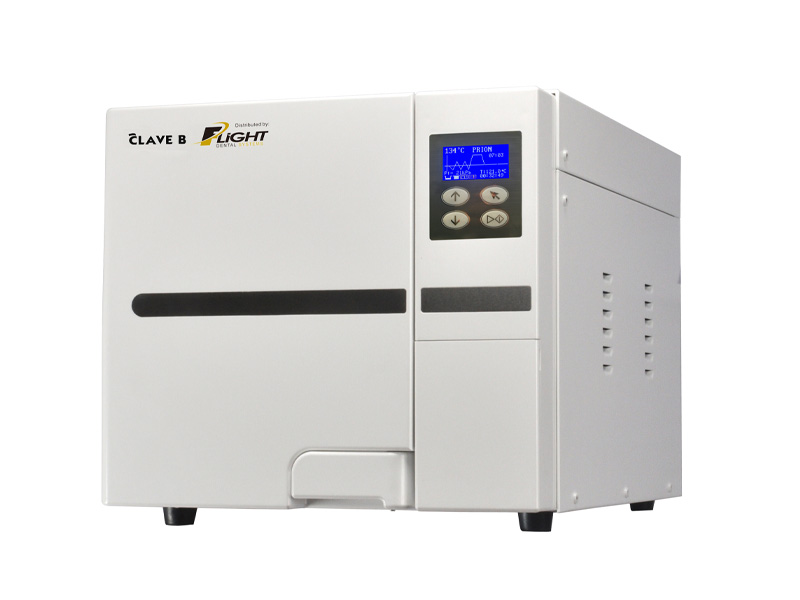
Flight Dental Autoclaves
Flight sterilizers typically require service around seals, drainage systems, filters, and routine preventive maintenance components.
BIOBASE Tabletop Sterilizers
BIOBASE sterilizers are becoming increasingly common in Canadian clinics thanks to modern touchscreen controls, vacuum systems, and compact Class B designs.

Follow the autoclave fault through the cycle stage.
The flow below is adapted from manufacturer operating logic and gives clinics a clear service-manual style view of how autoclave repair should be approached before random part replacement.
When one sterilizer fails, the whole clinic feels it.
A strong autoclave repair page should sound like it understands real clinic workflow pressure, because that is the moment when clinic managers decide who they trust to call.
The real Vancouver clinic scenario
Here is what we usually see in Vancouver clinics: a Monday morning hygiene block, one sterilizer already running continuously, another chamber unit loaded with pouches, and then the backup sterilizer suddenly starts aborting mid-cycle.
In that moment, autoclave service becomes part of a larger dental equipment repair plan in Vancouver, because sterilizer downtime affects scheduling, instrument flow, compliance documentation, and the clinic’s ability to keep working safely.
Local compliance matters after the repair
A local compliance section should be just as visible. In B.C. dental practice, staff are expected to review and document daily sterilizer operation, check and record mechanical indicators for each load as much as possible, run weekly biological monitoring for each sterilizer, quarantine implantable loads pending BI results, and avoid routine flash sterilization. Provincial guidance also notes that some municipalities in B.C. require backflow prevention measures tied to office water systems. Put simply, autoclave repair in Vancouver is not only about fixing a machine; it is about restoring a monitored sterilization process safely and defensibly.
After major faults, repair is not the final step.
One final point belongs near the bottom of the page because it builds trust: after a malfunction, relocation, major repair, or sterilization failure, the sterilizer should be qualified before being put back into routine use. Midmark’s startup and qualification guidance explicitly says this testing should include biological and chemical indicators, with three consecutive qualifying cycles and quarantine of processed items until results are known. For clinics looking for autoclave repair in Vancouver, that is the right closing promise: not just “we fixed the error,” but “we helped you return the sterilizer to service correctly.”
A sterilizer repair is not complete until the process is reliable again.
If your clinic needs reliable autoclave repair in Vancouver, BioDen can help with troubleshooting, emergency response, preventive maintenance planning, brand-specific service, and support that reflects how sterilization really works in busy Vancouver dental offices.
BioDen can help with
- Recurring error codes and aborted cycles
- Wet loads, drying issues, leaks, and slow heating
- Midmark, Tuttnauer, SciCan, Enbio, Flight, BIOBASE, and more
- Preventive maintenance planning and return-to-service support